
Are your old seeds really just a pack of lies?

Gardening is a game of patience.  You sow your seeds and wait with bated breath until you see the seedlings emerge.  For those of us with a "healthy" stockpile of seeds left over from past seasons, it can be an unwelcome surprise to find that they don't last forever.  The seeds you planted weeks ago have failed to germinate, and now you need a change of plans (or, should I say, plants).  I experienced this firsthand recently, and wanted to share the results of my own experiment.

What is seed germination?

Seed germination is the process by which a plant grows from a seed. It starts when the seed takes up water, which triggers enzymes to break down stored food inside the seed. Once the food is broken down, it provides the energy for the plant embryo to grow roots, a stem, and leaves.

Which seeds are less likely to stay viable after multiple years?

While some seeds can last for decades, others lose viability quickly. The general consensus is that the following types of seeds are unlikely to stay viable after multiple years:

  • Onion and leek
  • Parsley and parsnip
  • Corn, pepper, and eggplant
  • Tomato (can last up to 4 years, but germination rate drops quickly past year 1)

Testing the germination rate of old seeds

How to Guide

To test the germination rate of your seeds, you'll need a few things:

  • Seeds
  • Soft paper product that will hold water, ex: paper towel or coffee filter
  • Water
  • Plastic bag (optional)
  • Permanent marker (optional)

Steps:

  1. Soak the paper towel or coffee filter with water and then squeeze the excess water out, leaving it damp.
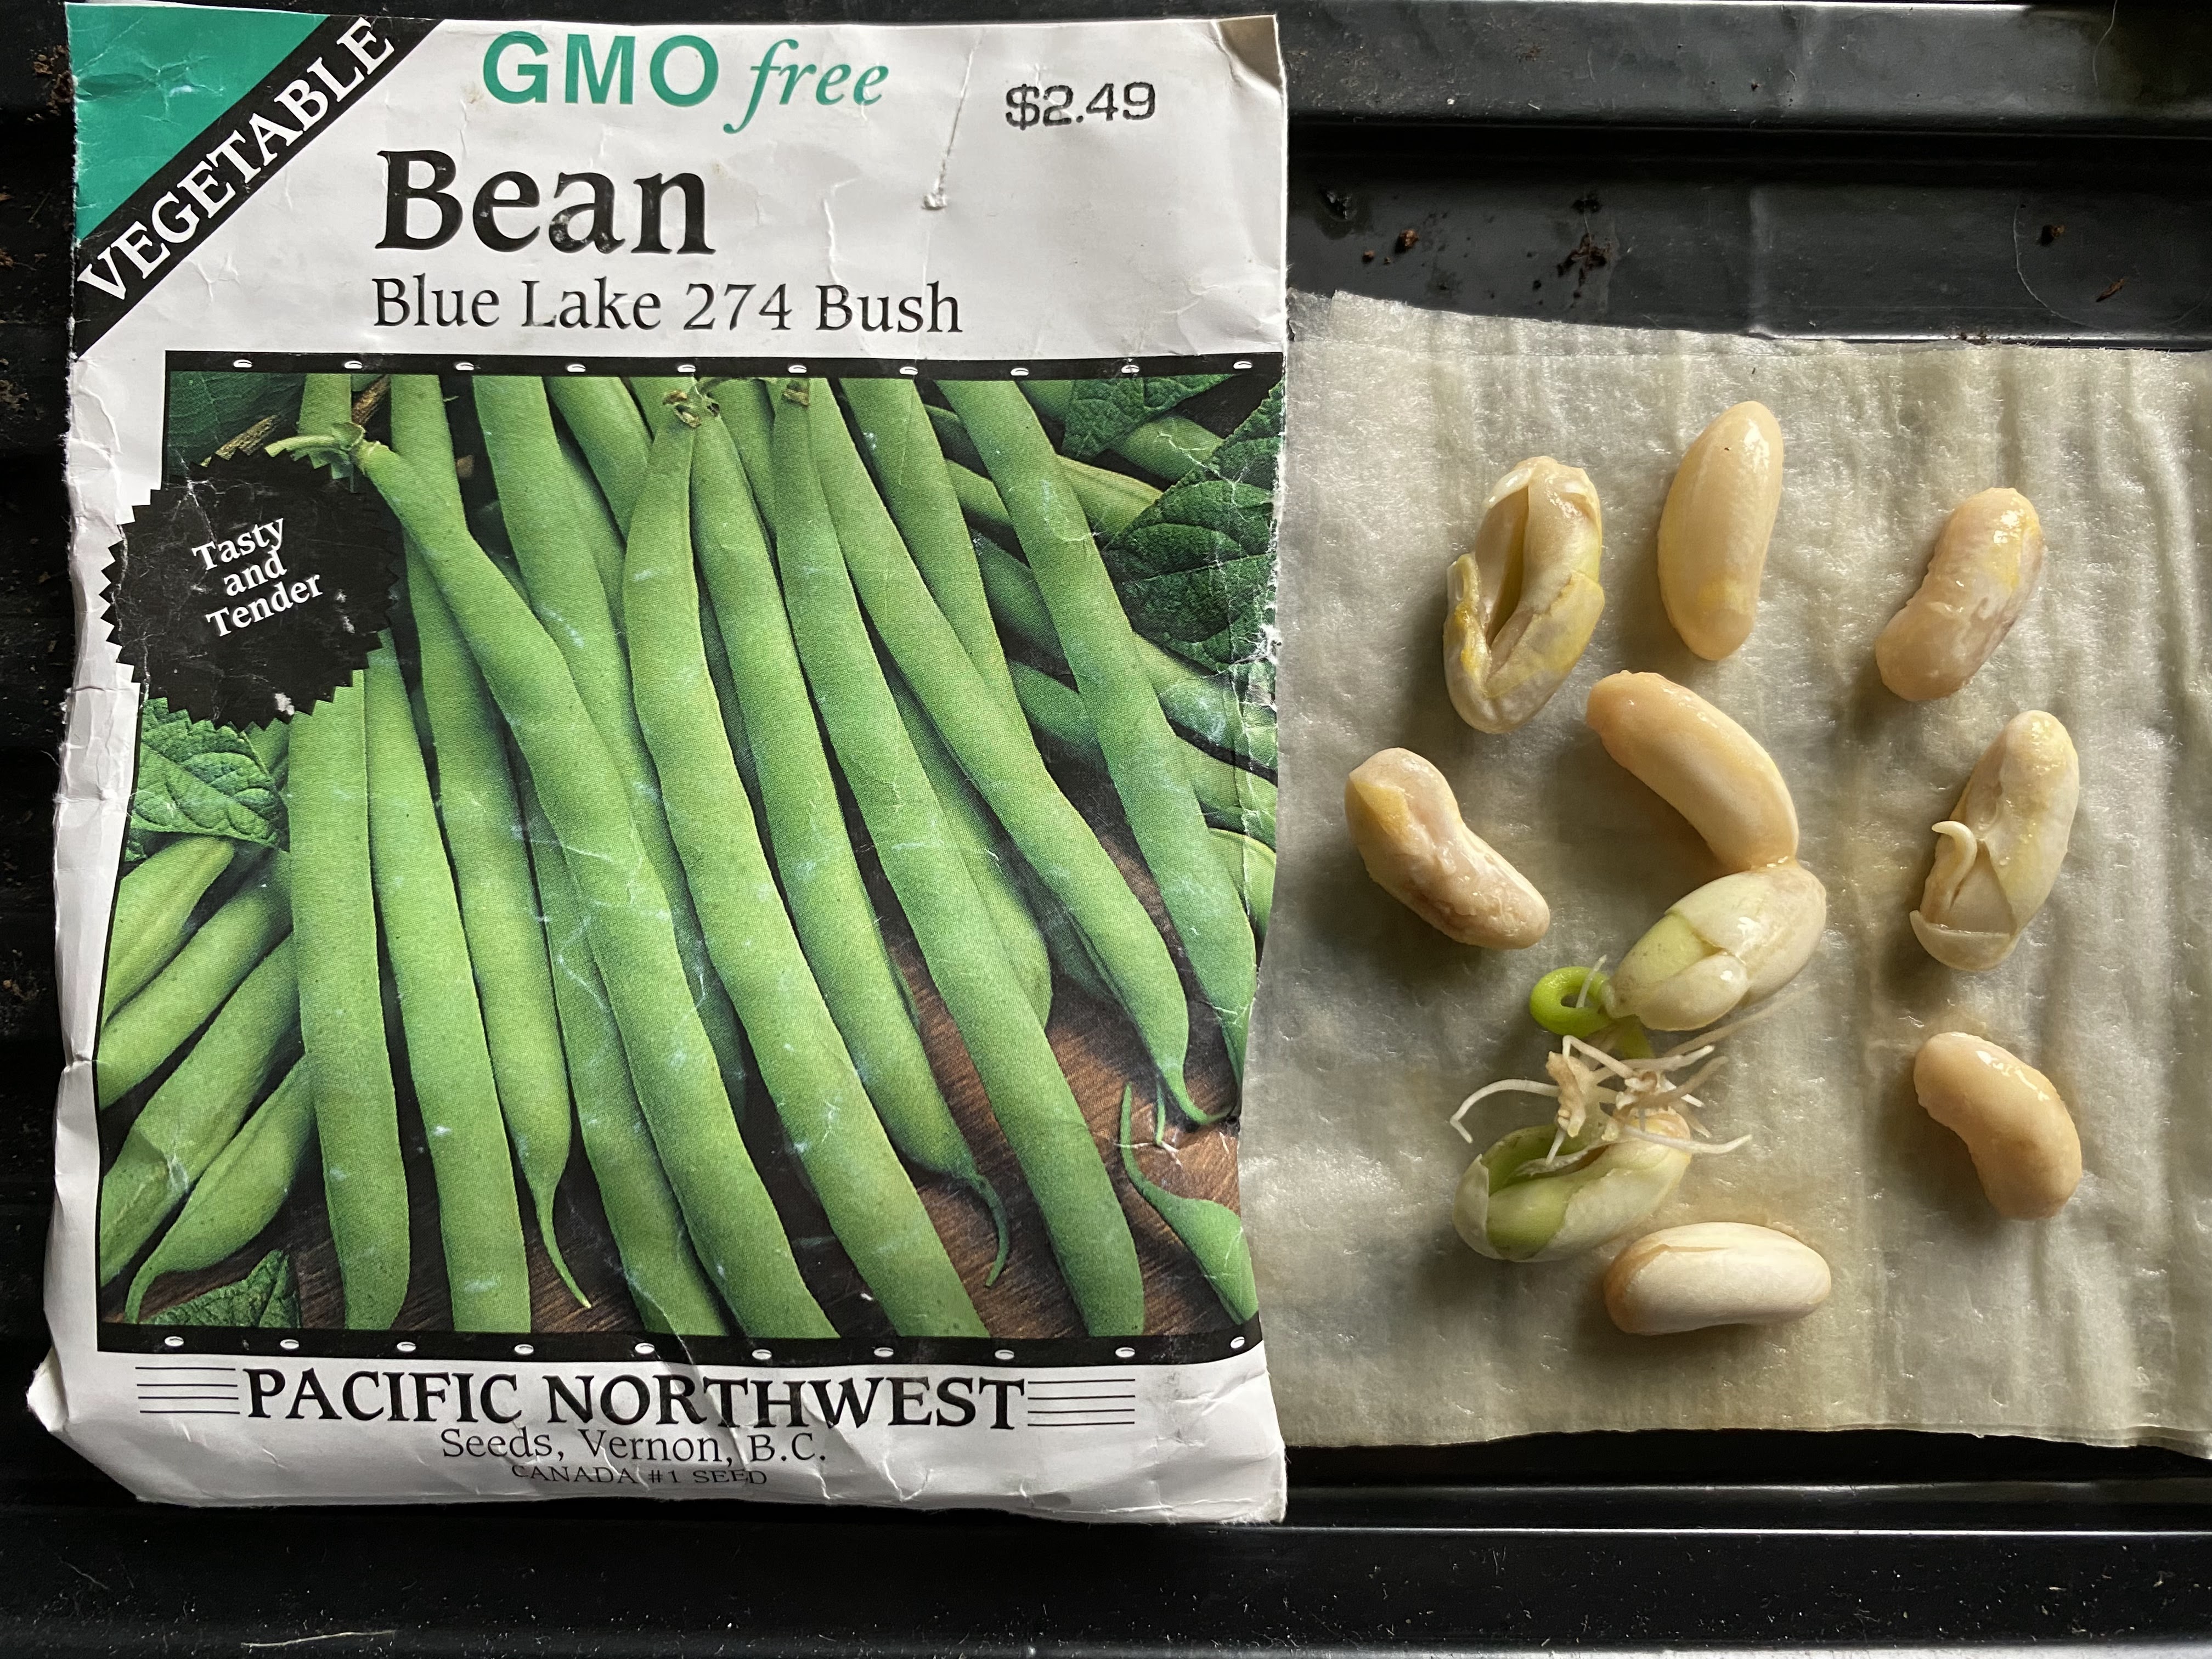
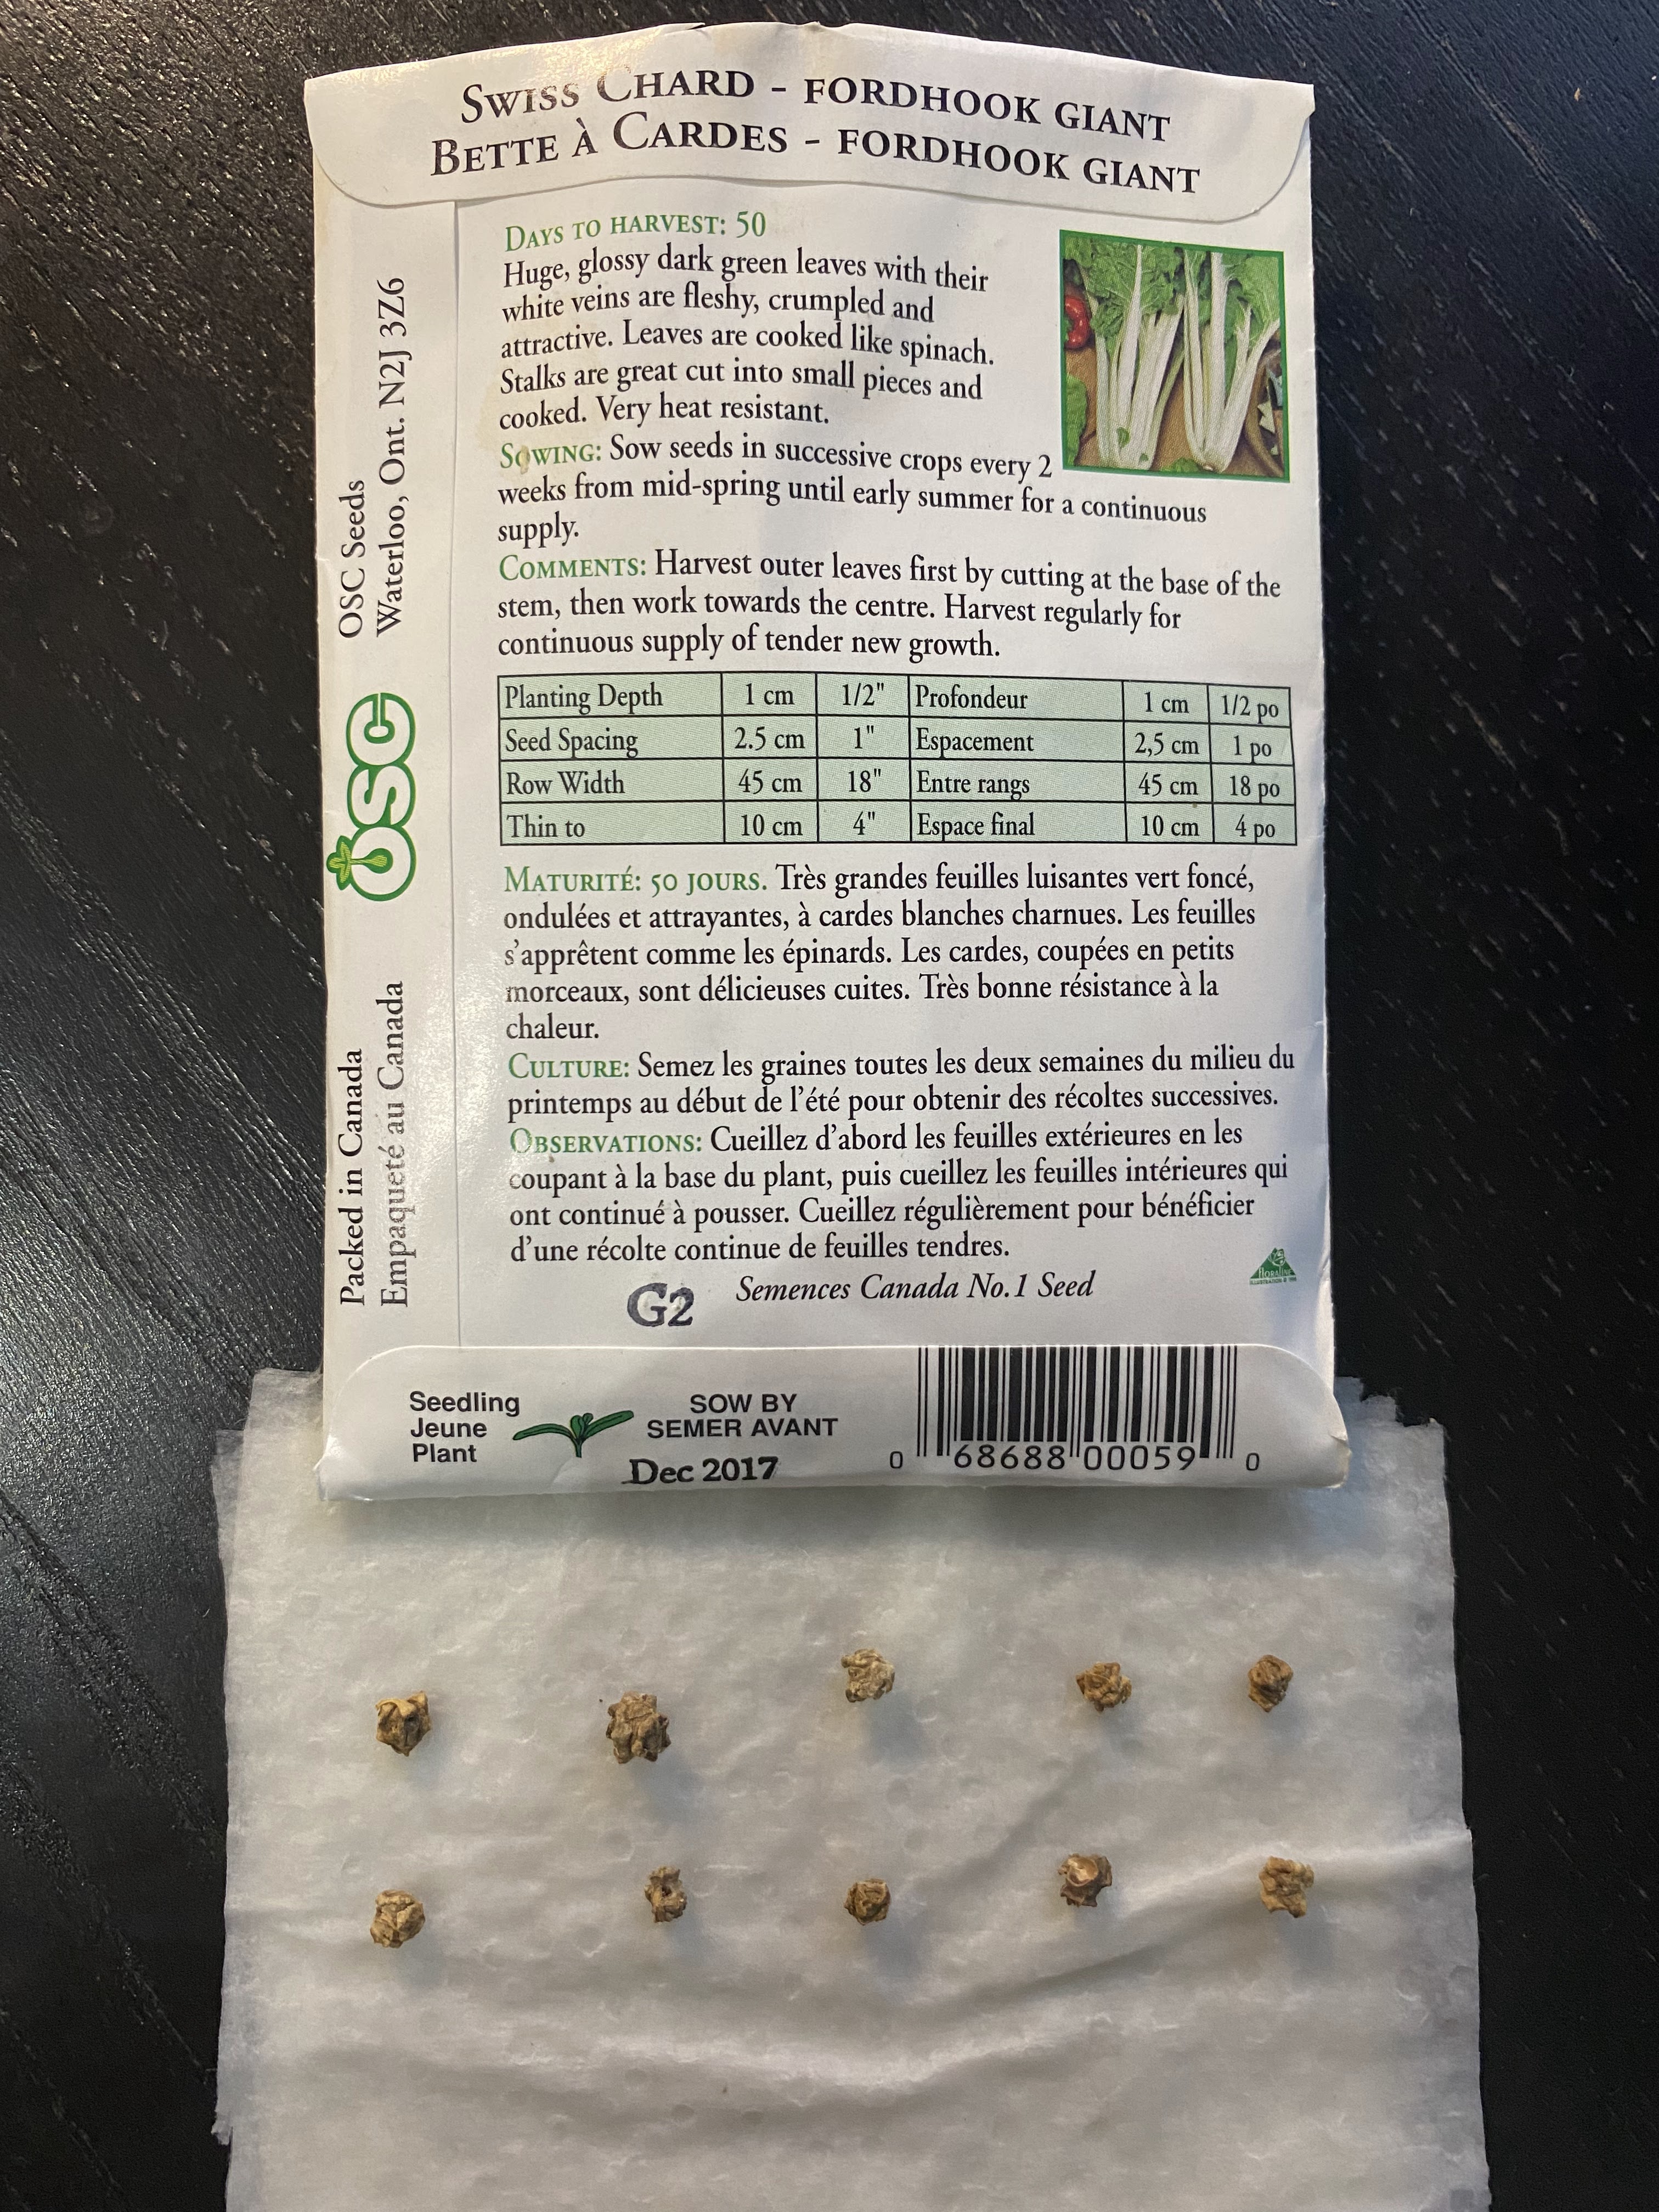
  2. Place the old seeds on the damp paper towel or coffee filter, leaving some space between each seed.  I recommend using 10 seeds just to make the percentage calculation easy.  The more seeds you use, the more accurate your result will be.
  3. Fold the paper towel or coffee filter over the seeds so that they are fully covered.
  4. Optional: Put the folded paper towel or coffee filter in the plastic bag and seal it.  If you don't do this, you just need to keep an eye on the paper to ensure that it doesn't dry out.
  5. Optional: Label the bag with the date and the name of the seed.  Alternatively, take a photo of the seeds & seed pack together so the date & info is stored in your phone.
  6. Put the bag in a warm, dark place like a closet or drawer.
  7. Research the "time to germinate" for the specific seed you're testing, and check the seeds after that amount of time to see if they have started to germinate. Some seeds will germinate quickly, while others may take up to 3 weeks.
  8. After another week or so, count the number of seeds that have germinated and divide by the total number of seeds. This will give you the germination rate.
  9. If the germination rate is too low (the threshold is up to you, I would use 50%), it's best to discard the old seeds and purchase new ones.

Real-life Results


Let's say hypothetically that I was recently sold 11 packs of seeds without noticing that the "sow by" dates ranged from December 2014 to December 2017.  Let's use the germination test to see whether any of these are still good.  All of the side-by-side comparison images below were taken 2 weeks apart.

Bean - ?? - Fail 40%

Cabbage - 2016 - Pass 80%

Carrot - 2014 - May need more time

Cantaloupe - 2016 - Fail 0%

Celeriac - 2017 - May need more time

Cucumber - 2015 - Fail 0%

Lettuce - 2015 - Fail 0%

Onion - 2015 - Fail 0%

Onion - 2015 - Fail 0%

Radish - 2015 - Pass 100%

Spinach - 2016 - Fail 10%

Squash - 2016 - Pass 60%

Swiss Chard - 2017 - Pass 50%

Conclusion

If you kept track, only 4 out of the dozen packets of seeds were not total garbage, and the jury's still out on 2 more of them.  Please learn from my mistakes.  In general, it's best to use fresh seeds whenever possible.  If you have a pack of seeds that seems suspiciously (or obviously) old, it's probably not even worth the effort to test them out.  Time lost in the growing season can never be recuperated, so it's a good idea to test the germination rate of any questionable seeds before planting them.

Comments

Popular posts from this blog

Gardening Guide: Thinning Seedlings 🌱

  Credit: @plannt_ca on Instagram Starting a garden from seed can be a great way to grow your own fruits and vegetables. However, as the seedlings begin to grow and mature, it is important to thin them out to ensure that the remaining seedlings have enough space to grow and thrive. What is thinning? When seedlings are first planted, they are usually sown very close together to guarantee that some of them germinate in an area.  Thinning is the process of removing some of the seedlings from a group to give the remaining seedlings more space to grow.   Depending on how you originally planted your seeds, this could be one of the more difficult gardening tasks you encounter throughout your entire season.  Thinning becomes more difficult if you planted multiple seeds in the same spot instead of spacing individual seeds at the manufacturer-recommended seed spacing distance. Also, regardless of your sowing method, thinning can be a laborious task for crops like beets or carr...

Gardening Guide: How to Harden Off Seedlings in 7 Days 🌱

  Photo by  Zoe Schaeffer  on  Unsplash Hardening off seedlings is an important process that allows young plants to gradually adjust to outdoor conditions before being transplanted into the garden.  If you skip hardening off your seedlings and go straight from indoor to transplanting, you may risk stressing them.  Stressed seedlings can show signs like limp stems, off-color foliage, or even sunburn. Gardening is already an exercise in patience, so why not give your seedlings the best chance at thriving by gradually introducing them to the outdoors?  Note that this process can look different for everyone; some seedlings are more sensitive than others, and all yards have different sun/wind conditions.  Feel free to try this 7-day plan as a starting point, and then adapt it to suit what works best for your environment and what you're growing.  The main idea is: take baby steps.  Your baby plants will thank you. Here is a cheat sheet for our...

Gardening Guide: Sowing Seeds Outdoors 🌱

Photo by  Joshua Lanzarini  on  Unsplash Square foot gardening is a popular gardening method that allows gardeners to maximize their space and grow a variety of plants in a small area. The idea behind this method is to divide your garden into square-foot sections and plant different crops in each section. This method not only saves space but also helps to reduce the amount of water and fertilizer used. In this blog post, we'll explain how to sow seeds outdoors when following a square foot gardening method. Step 1: Plan Your Garden The first step to sowing seeds in a square foot garden is to plan out your garden space. Here are some considerations for this: The types of growing space you have Raised bed, in-ground, containers How the sun moves in your yard throughout the day, and which areas get the most sun.   What types of crops are best suited to your growing space and environment Light levels, wind, season length, soil drainage. What crops you want to grow & w...